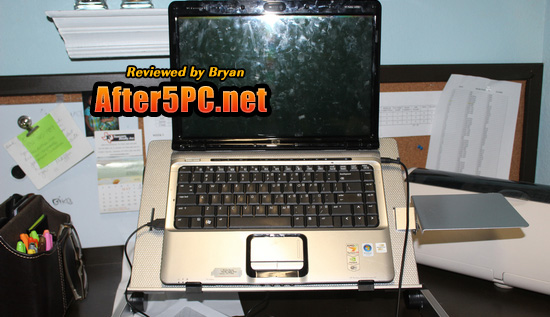
This is the first adjustable portable laptop desk table that I have seen. My 15″ laptop fits on it perfectly (excuse the smudges all over the laptop screen; the kids like to play games on my laptop). The previous one that I owned was not adjustable and was only really meant primarily as a laptop vent to keep the notebook from over-heating and damaging the components inside.
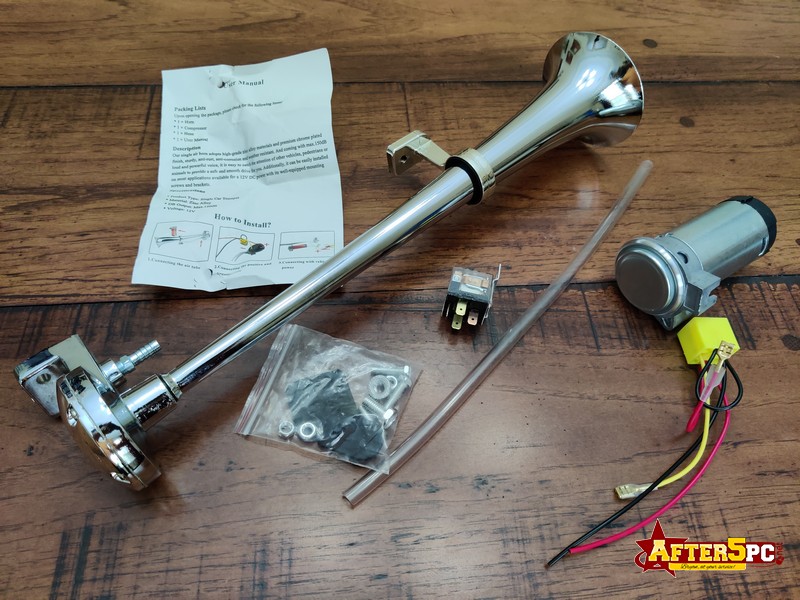
When you receive the set, you will see the following package contents as shown in the photo below:
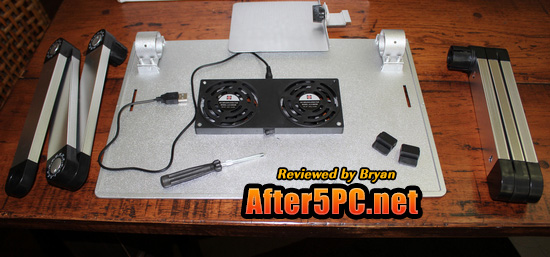
As you can see, there will be some assembly required before being able to use the item. The good news is that you’ll have all the necessary tools needed to assemble the notebook desk, including a screw driver — which is a nice bonus to have. You will also see 2 black rectangular “clips” (for lack of a better word; see right side on the photo above). These clips attach to the main unit in order to provide some “padding” so that you don’t scratch up your laptop computer with the edge of the laptop holder. I figured this all out on my own using common sense. You’ll find out in my explanation below why I didn’t know what those “clip-looking” things were for initially.
For some reason, I didn’t find a separate manual… but perhaps it had one, and one of my kids just lost it. My kids thought that the package left in the room was for them, and my eldest unboxed the package herself and started playing with the screws and assembling the “toy” when she saw the screwdriver. My poor 8-yr old could not figure it out I guess, because I found the unit still in disarray when I caught her “playing” with it. Even though there was no separate manual, there are instructions glued unto the packaging itself (this might be to save the manufacturer money, instead of printing a manual) to help with the assembly.
I think it would have been better to have a manual with pictures included. I had to rely on photos of the finished product that I saw online in order to get an idea of how the adjustable “feet/legs” are supposed to be placed.
You will find 2 circular slots (see photo below) on both sides of the main unit.
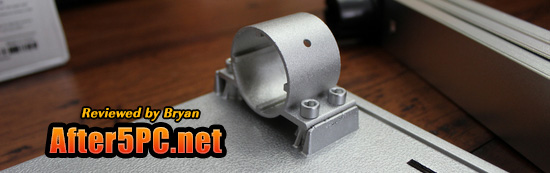
This is where you will be inserting the legs/feet. The part of the legs that need to be inserted to this has a groove, so you’ll get an idea of how to put it in. However, it is still confusing because it can go both ways — either on the left slot, or the right side. Depending on where you inserted it, the direction of the legs will be different. It will work either way, but one way is more stable than the other due to balance issues. This is where I had to rely on photos of the finished product online to make a determination on how and which side to insert the legs. My suggestion is that once you insert the legs, don’t screw them in first — until you test out the laptop desk and ensure that you have configured the legs in the right direction for stability purposes.
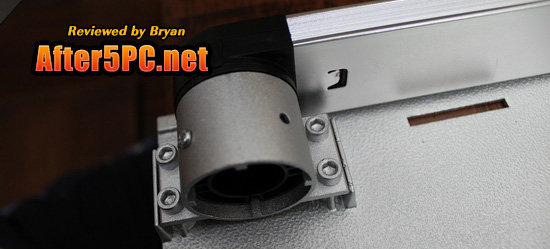
There are no pre-drilled screw holes on the legs, so you have to press and drive the screws in, in order to attach the legs to the main unit. This is not a problem, however, because the area where the screws need to be secured is made of plastic material… so screwing in does not take a lot of effort once the screw has penetrated the surface of the plastic. The hole on the slot in the above photo is where you will be driving in the screw that is included.
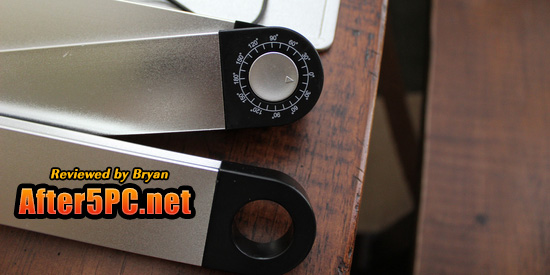
By the way, as I have previously mentioned, the legs are adjustable. The legs have pre-marked angles/degrees that you can adjust to. See photo below to get an idea:
Don’t worry. Just like anything that needs to be assembled, things will appear to be confusing at first… but once you get started, it will start flowing. That’s how it went with this one.
The final assembled adjustable vented laptop table, will look like this:
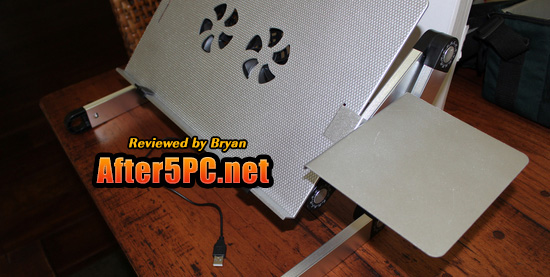
The portable desk comes with another accessory attachment to hold your mouse or mouse pad. There is a slit on both sides of the unit where you can insert this attachment. It will fit like a puzzle, so you won’t make any mistake on this. Adjust the angle accordingly, and you’re set. You can easily move this on the left side or the right side of the desk, depending on whether you are left-handed or right-handed, or where you prefer the mouse to be. I like mine on the right side.
As far as the air vents are concerned, you just need to attach the USB cord coming from the main unit into the USB port of your laptop. Once connected, turn on the cooling fan using the power switch located behind the laptop desk unit (on the bottom). The cooling fan that is included with the desk helps dissipate the heat coming from the laptop and provides a way to cool off your notebook computer. Overheating can cause damage. Not only that, but have you ever put a notebook computer that has been on for some time on your lap? It can burn! This helps with that.
To find out more about the Accuon Adjustable Vented Laptop Table Computer Desk, you can go to this Amazon page. It is currently being offered at a 67 percent discount at the time of this writing.

0 Comments